Optimising your images is the new way to boost your SEO because now Google are focusing on websites that load fast, and optimising your images is a sure way to make that happen.
Have you ever wondered the following….
- Why is it that when I do a Google image search, my photos never show up?
- Should I add “Alt Tags” to my images?
- And what’s the difference between a JPEG, GIF and PNG?
1. Name Your Images Descriptively and in easy to read english
It’s easy to trail through hundreds of your product shots and keep the default file name the same as your camera provides. But before you continuing doing that, let’s discuss why that’s not a good idea.
When it comes to SEO, it’s really important to use acceptable keywords to help your webpage rank on Google. Creating a descriptive, keyword rich file name is absolutely necessary for image optimisation. Search engines not only crawl texts on webpages, but they also look for keywords within your image file names.
Let’s use this image as an example:
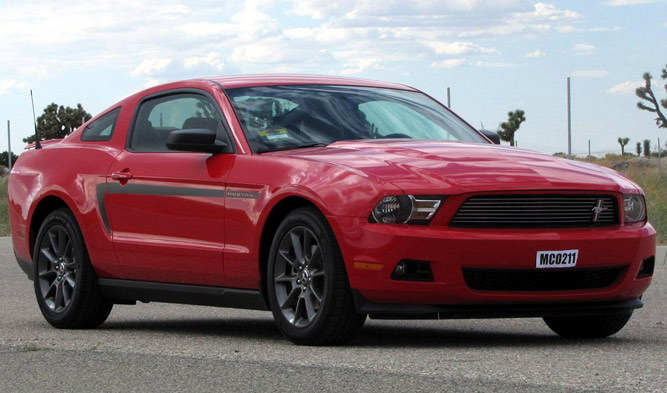
You could just use the name that your camera gives to the image such as DCMIMAGE12.jpg. But, it would be much better to name the file: 2012-Ford-Mustang-LX-Red.jpg instead.
Consider how your customers search for a product in Google. What naming patterns do you think they write when they search? In the example, car shoppers may search using the following terms:
- 2012 Red Ford Mustang LX
- Ford Mustang LX Red 2012
- Red Ford Mustang LX 2012
A great habit to learn is to look at your website analytics, and monitor what phrasing patterns your customers use to searches. Then determine the most common naming patterns used, and apply those names to your images.
If you do not want to that descriptive, be sure to use good keywords when naming your images.
It’s worth you reading this Questions & Answers from seomoz.org to really understand how import naming files for the images on your website are. It can increase your on-page SEO, and help your website and images rank highly.
2. Optimise Your Alt Tags
Alt tags are a text alternative to an image when a browser cannot properly render them. Even if the image is rendered, when you hover over it with your mouse, you can see the alt tag text created for that image.
The alt attribute also adds SEO values. Adding an appropriate alt tag to images on your website can help your website get better ranking, it does this by associating keywords with images. Using alt tags is the best way for any e-commerce product to show up in Google images.
Let’s take a look at the source code of an alt tag:

The number one priority when it comes to image optimisation is to carefully fill out each alt tag for every product image on your website.
Here are some rules when it comes to alt tags:
- Describe your images in English, just like you do for image file names. Clear and co-incise.
- If you sell products that have a model number or serial number, make sure you use them.
- Do not put too many unecessary words your alt tags (for example: alt=”ford mustang muscle car buy now best price”).
- Don’t use alt tags for decorative images. Search engines may penalise you for over-optimisation.
Always do a check on your website from time to time. View the source of each pages and check to see if your alt tags are filled out.
3. Image Dimensions and Product Angles
One big trend these days is to show different angles of your product. If we go back to the Ford Mustang, you wouldn’t want to show just one shot of the car – especially if you want to sell it. It would be in your best interest to show a few shots of the interior, the rear, close ups of the wheel rims, etc.
And the best way to exploit these photos is to fill out your alt tags. And the way you would do that is by creating unique alt tags for each shot:
- 2012-Ford-Mustang-LX-Red-Leather-Interior-Trim.jpg -> using the alt tag of: alt = ” 2012 Ford Mustang LX Red Leather Interior Trim “
- 2012-Ford-Mustang-LX-Red-Rear-View-Air-Spoiler.jpg -> using the alt tag of: alt = ” 2012 Ford Mustang LX Red Rear View Air Spoiler “
The goal here is to add descriptions to your alt tag so that searchers will land on your website.
Providing Larger Images – Be Careful
Sometimes you may want to provide bigger views of your photos, which is user experience enhancement – but be careful.
Don’t place large images on your website and shrink the dimensions via the source code. This will not improve your page load time because the larger file size.
Instead, make it a smaller image and provide the option to view a larger image in a pop-up or to be displayed on a separate webpage.
4. Reducing the File Sizes of Your Images
Most people wait about 3 seconds for a website to load on a desktop or a mobile device. As I mentioned Google now use page load time as a factor in their ranking algorithm.
If you have images that slowly “scroll” down the screen and take over 10 seconds to load, you run the risk of the customer leaving your website.
When a customer goes to your website, it can take a while depending on how large your files are. In particular with images, the larger the file the longer it takes a webpage to load.
If you can decrease the file size of the images on your webpage it will increase pageload speed, you have a much better chance of less people who visit your site will leave.
One way you can reduce image file size is by using the “Save for Web” command in Adobe Photoshop. When using this you want to adjust the image to the lowest file size while keeping an eye out for image quality.

Don’t Have Photoshop? That’s OK
Not every one has Photoshop, so there are a number of online tools you can use. Adobe even has an online image editing application at photoshop.com. The online version doesn’t have all of the capabilities of the desktop version of Photoshop, but it covers all the basics of image editing and doesn’t cost too much.
Other online image editing tools we have suggested are:
- Pixlr – is user-friendly, and also comes with a free app for your phone.
- PicMonkey – has been described as a “great photo editing tool”.
- FotoFlexer– this allows you to work with layers!
GIMP is an open-source, free image editing software application that can be run on Mac or Windows. It does everything Photoshop can do, but can be a bit clunky.
How Big Should My Images Be?
Try to keep your image file size below 70kb. That can be difficult, especially for a larger image.
5. What Image File Type Do I Use for the Right Situation
There are three common types of files that we use to post images. These are JPEG, PNG and GIF.
Look at the 3 file types and how they affect the same image:

JPEG images are an old file type and has become the standard image of the Internet for years now. JPEG’s are able to be compressed considerably, which results in quality images with small file sizes. You can see in the image above, the JPEG format provides nice quality and low file size.
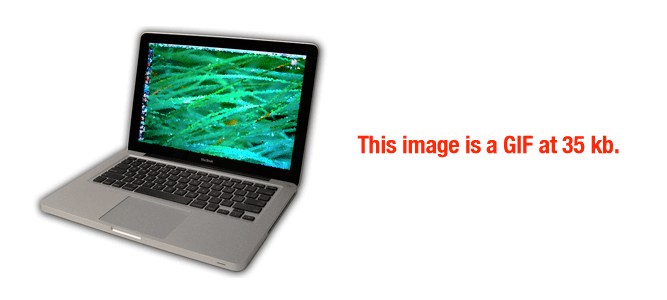
GIFs are smaller quality images than a JPEG and are used for more simple things such as icons. GIFs do also support animation. It’s great to use GIFs for the plain images on a website (because they are just a few colours), but for a complex image and photo, GIFs are not the best solution, especially as you enlarge them.
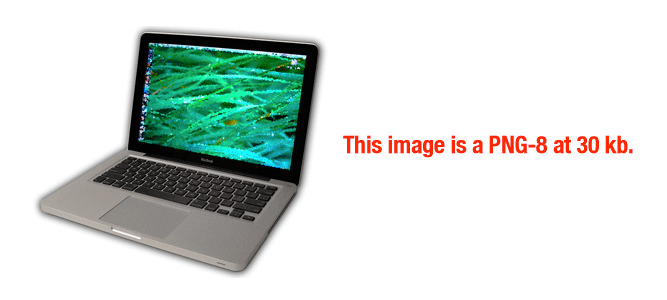

Then there’s a PNG, it’s becoming more popular as the alternative to a GIF. PNGs support many colours , and they don’t degrade over time with re-saves like a JPEG. Even though the PNG file type is starting to be used more, the file sizes can still be a little larger than what you would find normally with a JPEG.
See how the PNG-24 image is over three times bigger file size than the PNG-8 version. This is why you need to be careful when using PNGs.
Here is a guide to remember when choosing the right file format:
- For most e-commerce platforms – JPEGs will be your best bet. Its because they provide the best quality at the smallest file size.
- Never use GIFs for large images. The file size will be very large and there is no way to reduce it. Use a GIF for thumbnails or one colour images (for example a logo).
- PNGs can be a great alternative to both JPEGs and GIFs. If you can only get product photos in a PNG format, try using PNG-8 over PNG-24. PNGs excel at simple decorative images because of their extremely small file size.
6. Use Image Site Maps
If your website uses image pop-ups or other flash ways to improve the overall shopping experience – Google image site maps will help you get your images noticed by search engines.
Web crawlers can’t crawl images that are not called in the webpage source code, so in order to let them know about these, you must list their location in an image site map.
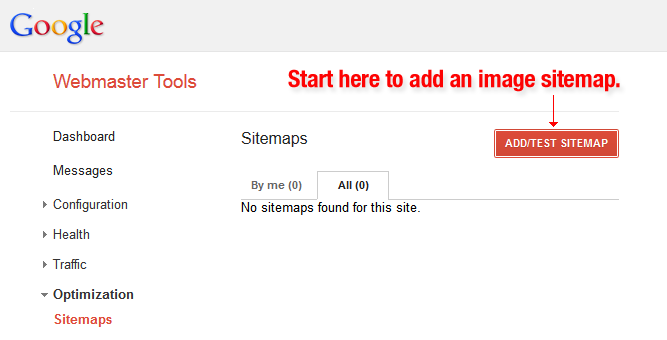
Google have many rules for image publishing to help your website rank better on the search engines that you can read here. You can also use the extension for images on Google Sitemaps to give Google more information about the images on your site, and doing this can assist Google in finding more images than what would be usually found through their search engine.
But using Sitemaps doesn’t guarantee that your images will be indexed by Google, you can increase the optimisation of your website, and especially the images by using Sitemaps. Google Webmaster Tools has many tips for correctly formatting the images for your Sitemap.
On Google Sitemaps it is important for you to add specific tags for all of your images. You can also create a separate Sitemap to list all your images. Follow these guidelines that Google suggests.
7. What is a Decorative Image?
Some websites have an bunch of images such as background images, buttons, and borders. Anything that is non-product related can be considered a decorative image.
A decorative image can add a lot of design appeal to your website, but they can result in large file sizes which in turn can mean slow load times. So you might want to consider taking a deeper look at your decorative images so that they don’t reduce your website’s ability to convert visitors into a buying customer.
Check the file sizes of all the decorative images on your web pages, and perhaps use a template that minuses file sizes for all of the pages on your website.
Here is some advice to cutting down the file sizes:
- For any images that are borders or patterns, make them PNG-8 or GIFs.
- Use CSS to create colours instead of using images. Use CSS styling as much as possible to replace any decorative images.
- Shrink down those wallpaper-style background image as much as possible without ruining the quality.
These are just some helpful ways to boost the speed of your site, which in turn will help your SEO, which in turn will make you be easily found on search engines. Contact us anytime if you need further help.

